Bat Block Tutorial

This a tutorial on how to make two different bat blocks. One block has the bat’s wings going DOWN. The other block has the bat’s wings going UP.
Down Winged Bat Block
Fabric needed for 1 block:
Background fabric:
· 2 – 1½” squares
· 5 – 2 ½” squares
· 3 – 1 ½” x 2 ½” rectangles
Bat Body fabric:
· 1 – 2 ½” x 3 ½” rectangle
· 2 – 1 ½” squares
Bat Wings fabric:
· 2 – 2 ½” x 5 ½” rectangles
1) Let’s start by making the bat ears unit.
a. Select a 1 ½” x 2 ½” rectangle of the background fabric and 2 - 1 ½” squares of the Bat Body fabric.
b. Mark a diagonal line from corner to corner on both 1 ½” squares of bat body fabric.

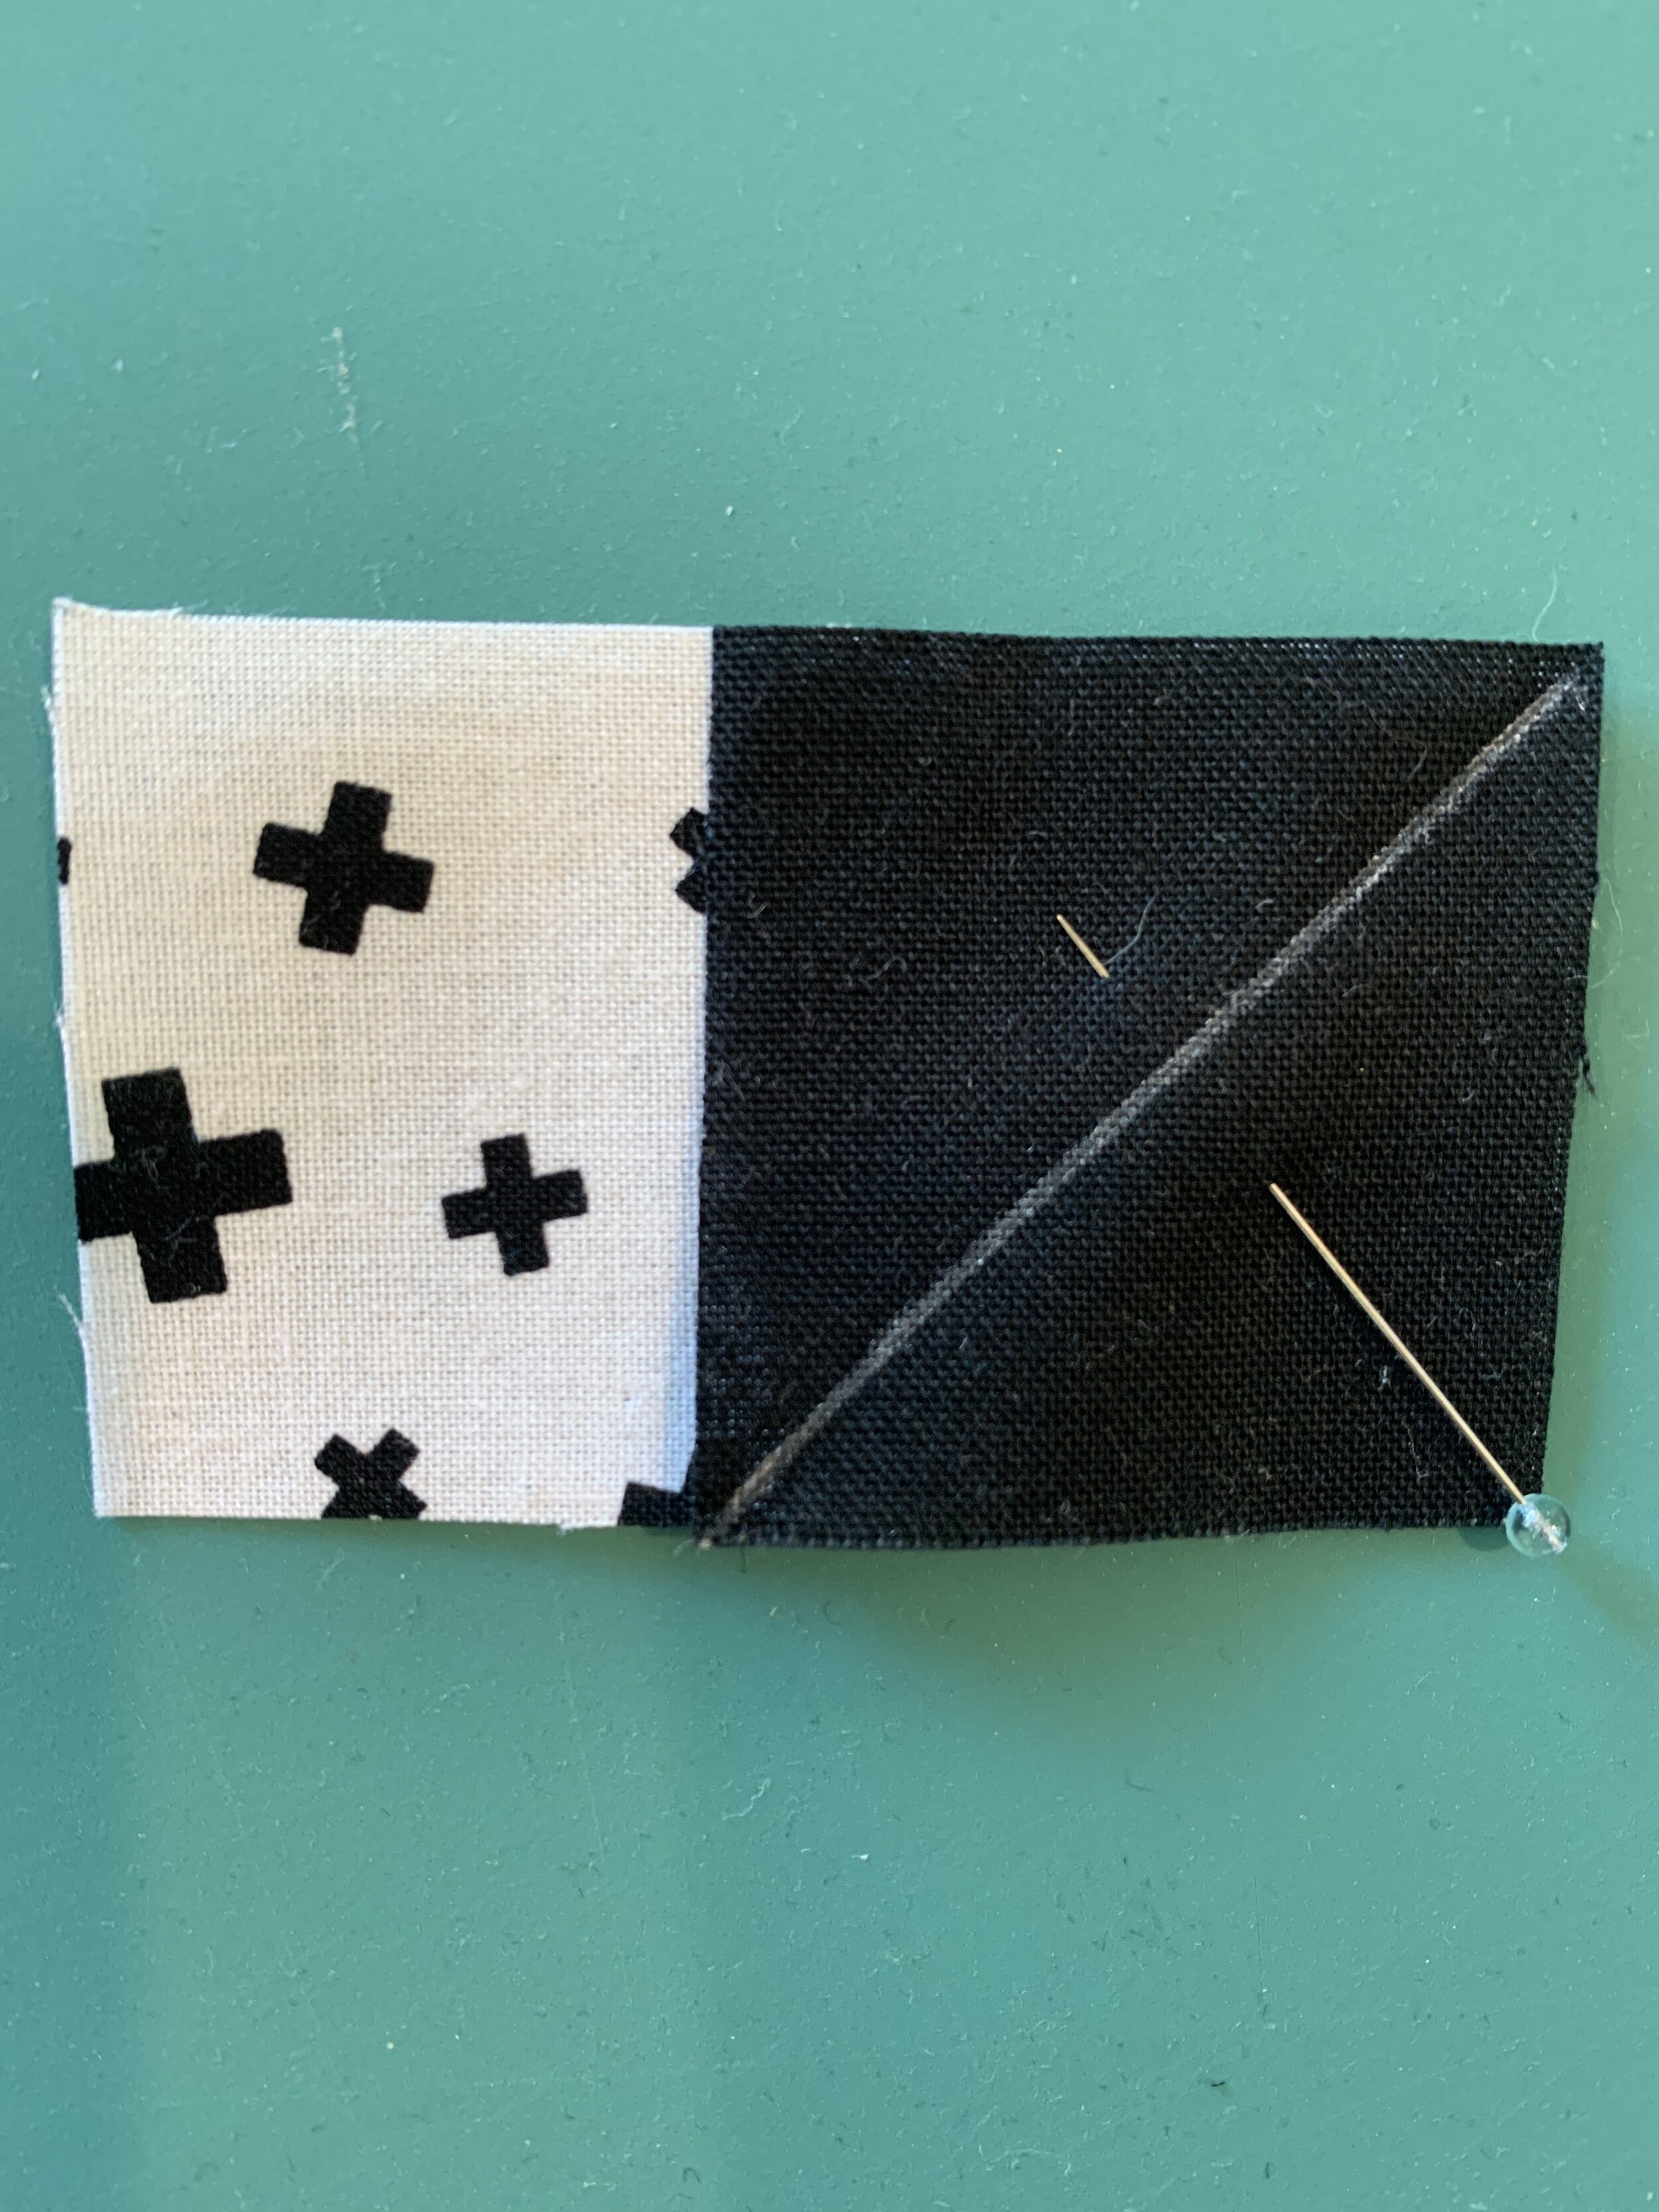
2) Take one of the 1 ½” squares and place it on the bottom right corner of the 1 ½” x 2 ½” rectangle.
a. Pin in place.
b. Sew on the marked diagonal line.

3) Trim the bottom right corner by cutting ¼” away from the seam line. Press seam to bottom right corner.


4) Using the other 1 ½” marked bat body square, place the square on the bottom left corner of the unit.
a. Pin in place.
b. Sew on the marked diagonal line.


5) Trim the bottom right corner by cutting ¼” away from the seam line. Press seam to bottom left corner. Square to 1 ½” x 2 ½”.


6) Now to make the Bat Body.
a. Select 2 – 1 ½” squares of the background fabric and the 2 ½ x 3 ½” rectangle of the bat body fabric.
b. Mark a diagonal line from corner to corner on both 1 ½” squares of background fabric.


7) Place a marked 1 ½” background square on the lower right corner of the 2 ½” x 3 ½” bat body rectangle.
a. Pin in place.
b. Then sew on the marked line.


8) Trim the bottom right corner by cutting ¼” away from the seam line. Press seam to bottom right corner.


9) Repeat this process for the bottom left corner. Square to 2 ½” x 3 ½”.

Bat Body!
10) Take the Bat Ears unit, the Bat Body unit and a 2 ½” background square.
a) Sew the Bat Ears units to the top of the Bat Body unit. Press seam to Bat Body.
b) Sew the 2 ½” background square to bottom of the Bat Body. Press seam to background square. Trim to 2 ½” x 6 ½”.

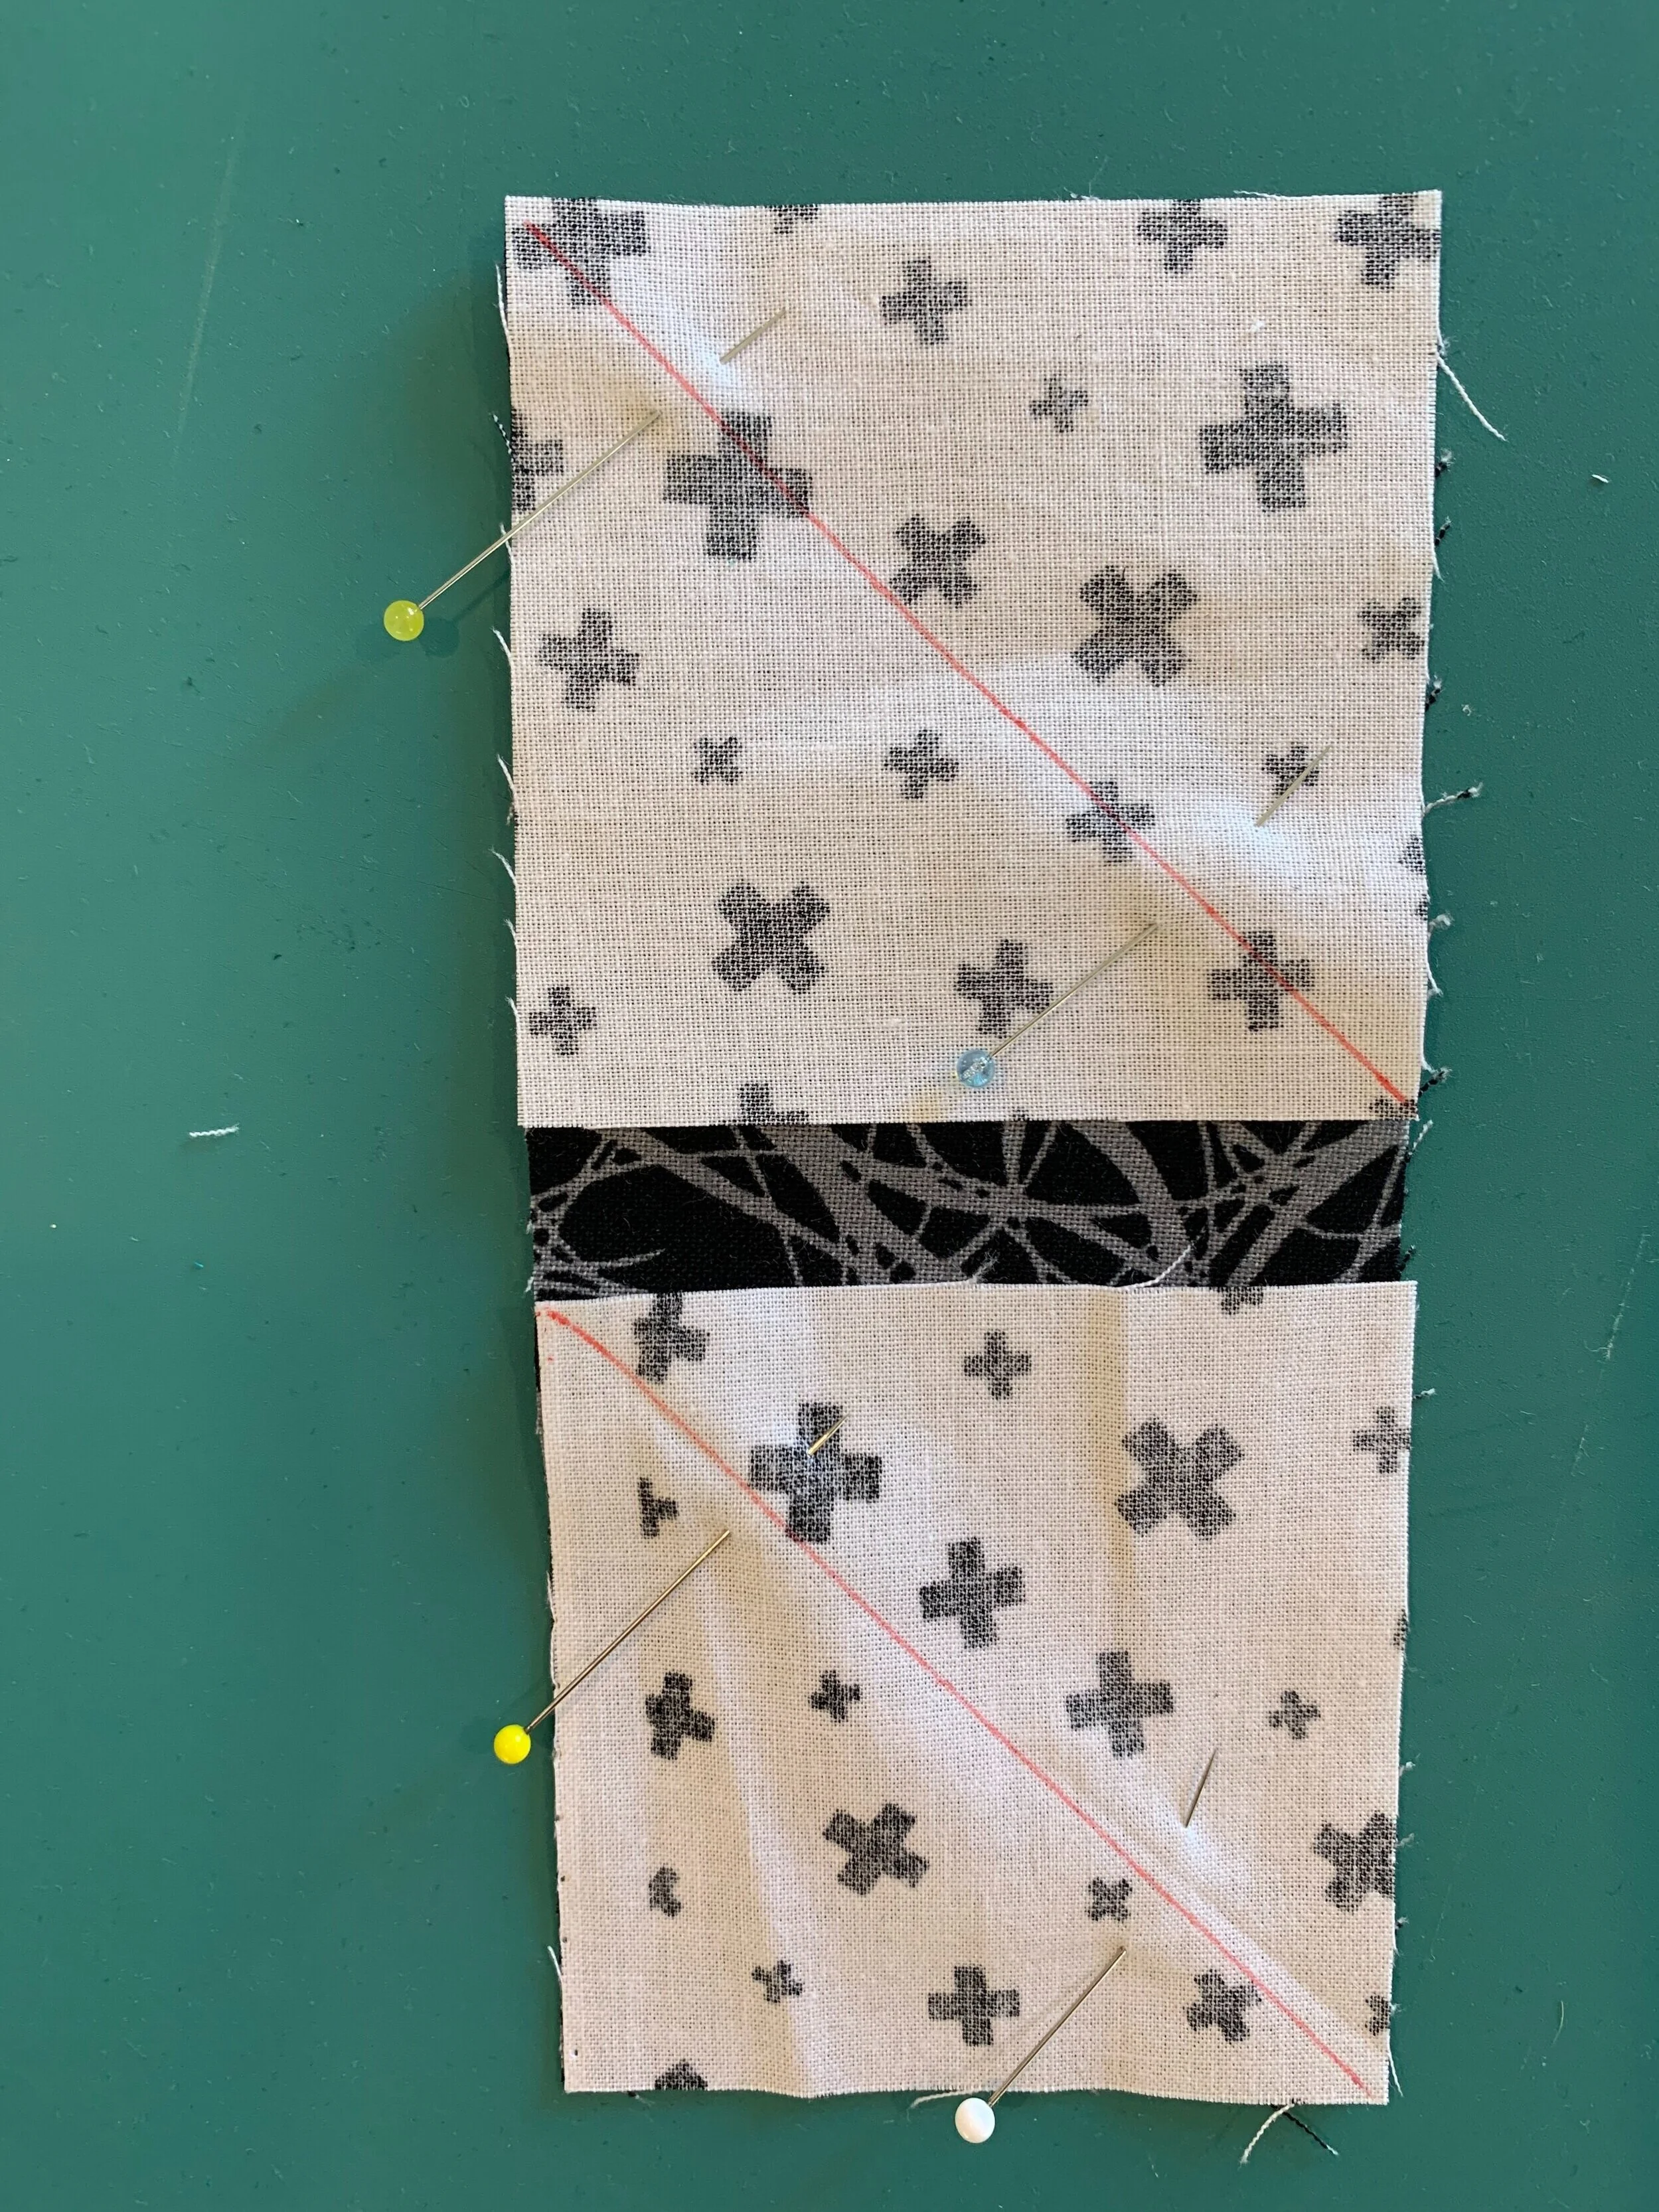
11) Now to make the Bat Wings. For the first wing, select a 2 ½” x 5 ½” rectangle of the Bat Wing fabric and 2 – 2 ½” squares of the background fabric.
a) Mark a diagonal line from corner to corner on the back of both of the 2 ½” background squares.
b) Using the first picture as a guide to layout, place one background square on the top of the Bat Wing rectangle and the other background square on the bottom of the rectangle. Make sure the marked diagonal lines are going in the direction as shown in the picture.
c) Pin background squares in place.
d) Sew on the marked diagonal lines.


12) Trim the lower left corner AND then the top right corner by cutting ¼” away from the seam line. Press seam to background fabric. Trim to 2 ½ x 5 ½”.
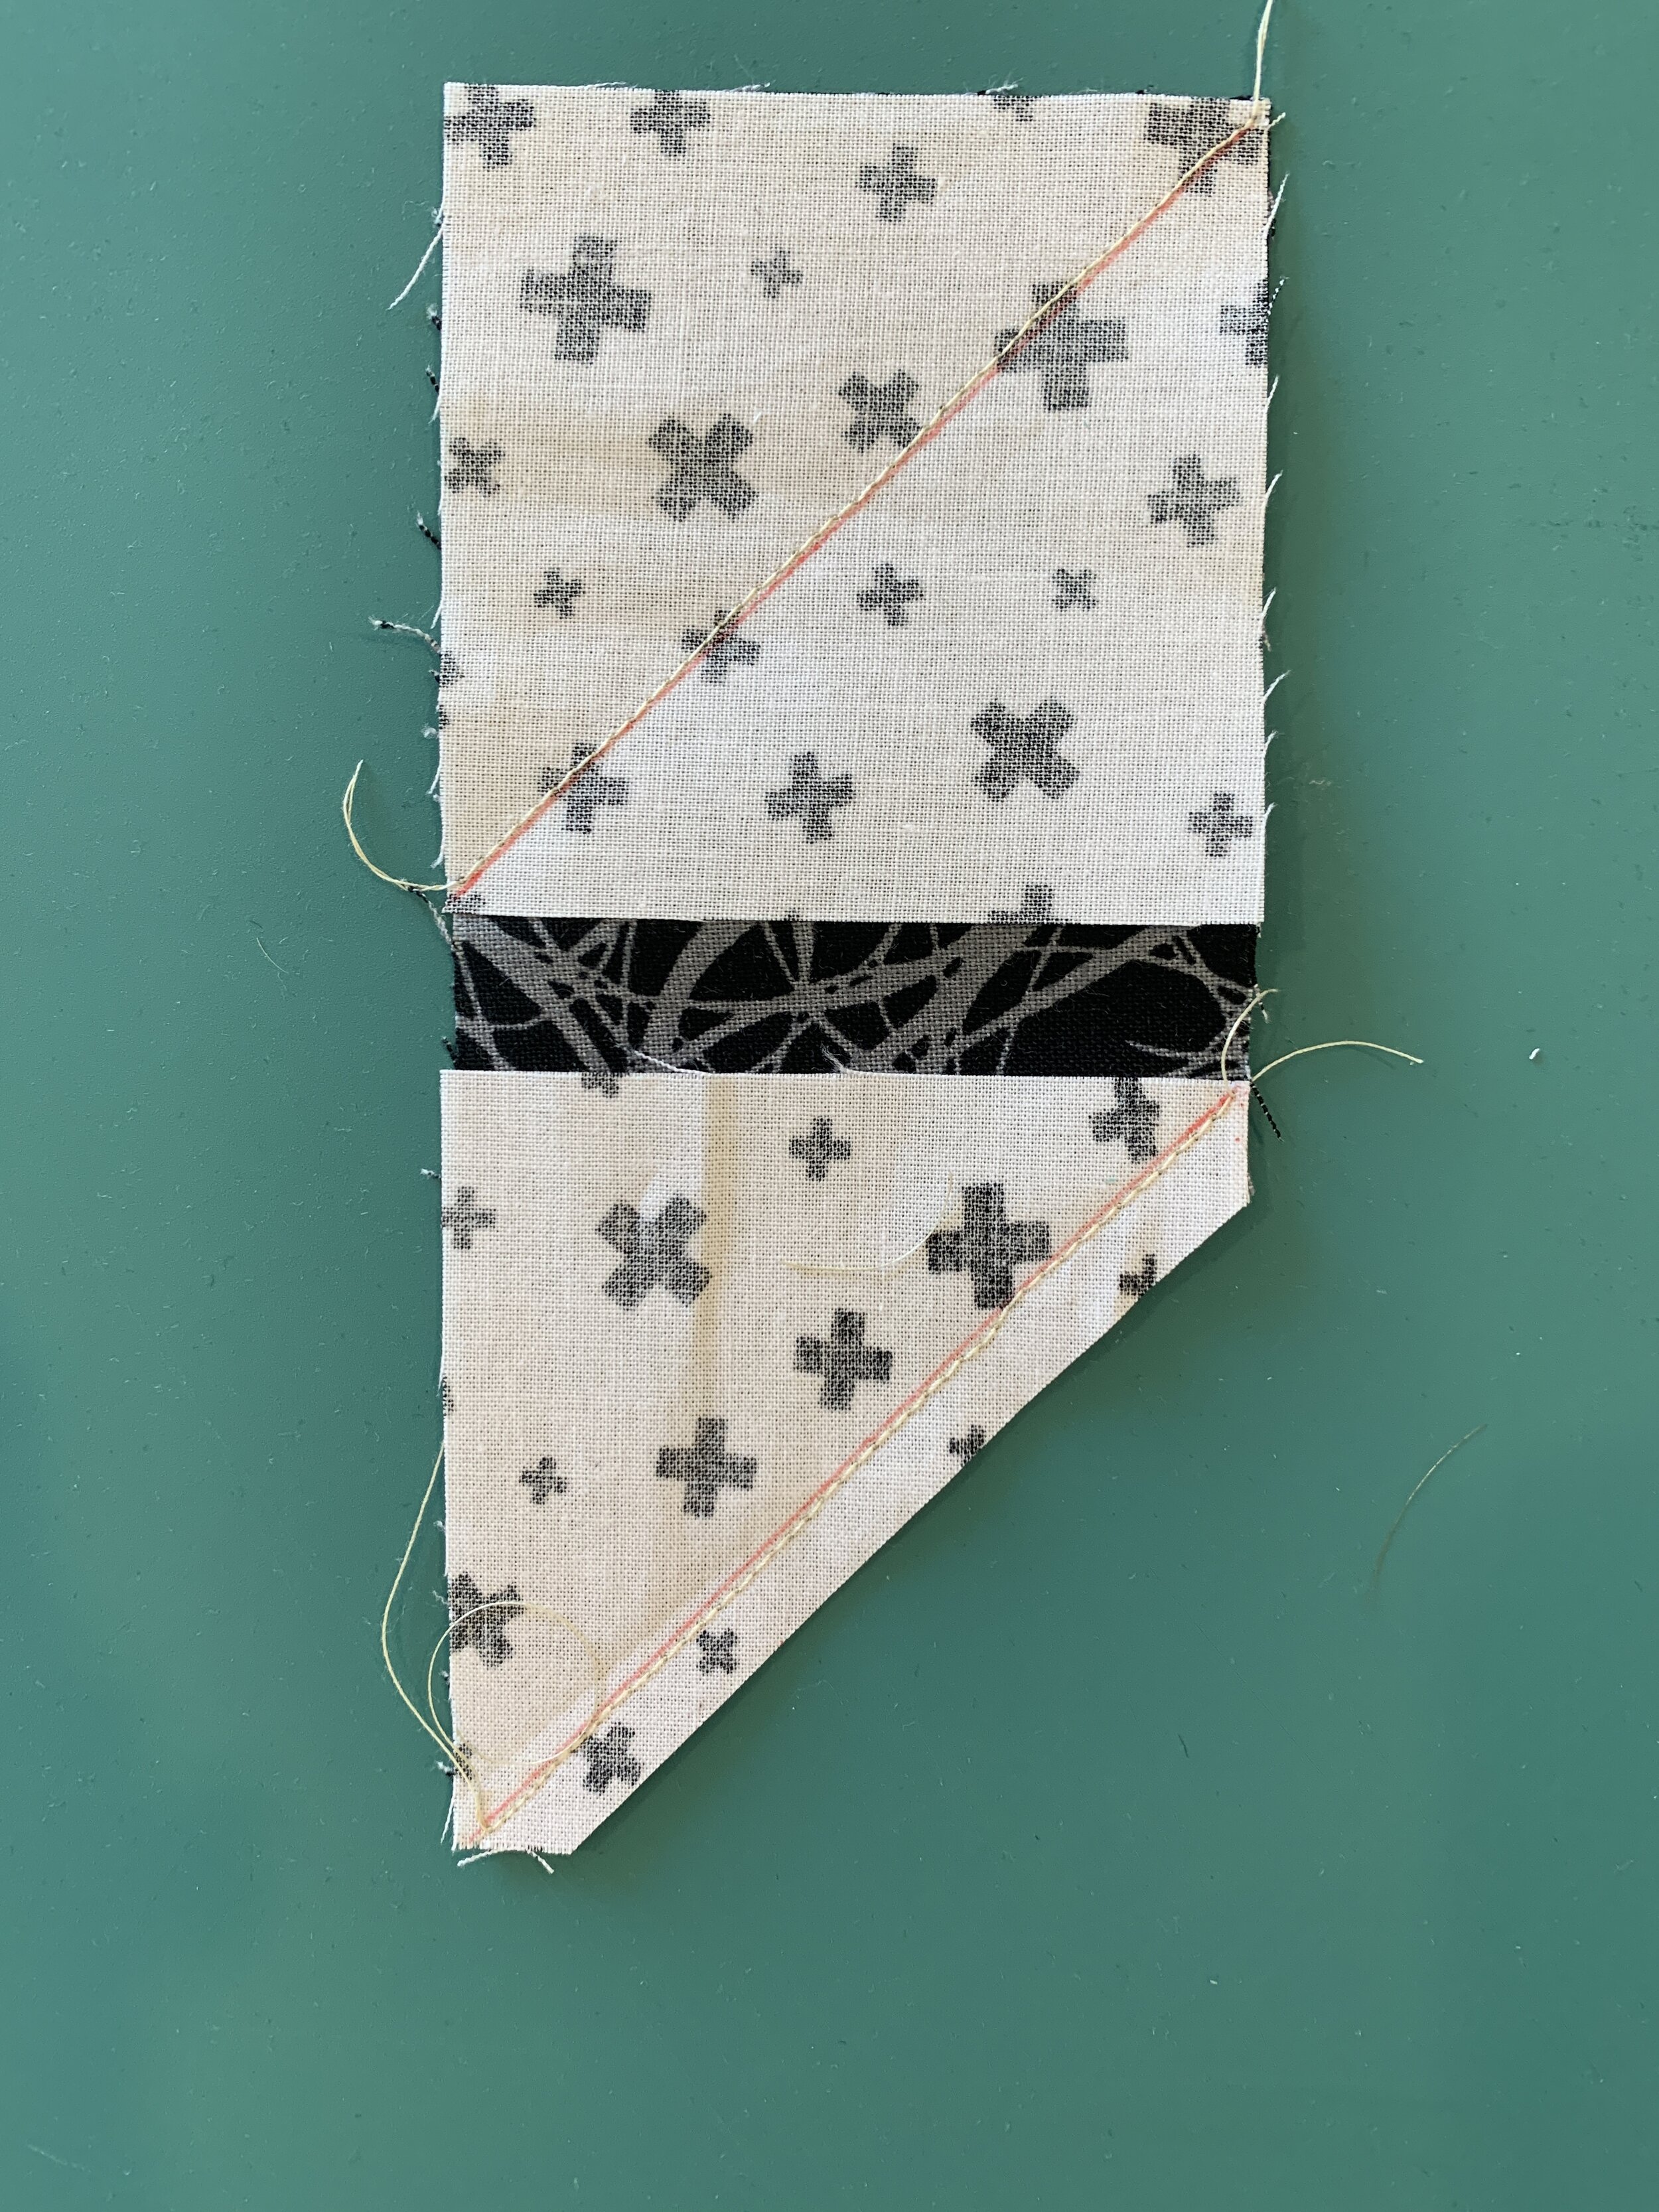


13) Sew a 1 ½” x 2 ½” background rectangle to the top of the Bat Wing unit. Press seam to background fabric. Square to 2 ½” x 6 ½”.


14) Using the other 2 ½” x 5 ½” rectangle of the Bat Wing fabric and 2 – 2 ½” squares of the background fabric, repeat this process described in steps 11 and 12 to make the other Bat Wing. See the first picture below for orientation of marked diagonal lines on the background squares.


15) Sew a 1 ½” x 2 ½” background rectangle to the top of the Bat Wing unit. Press seam to background fabric. Square to 2 ½” x 6 ½” .

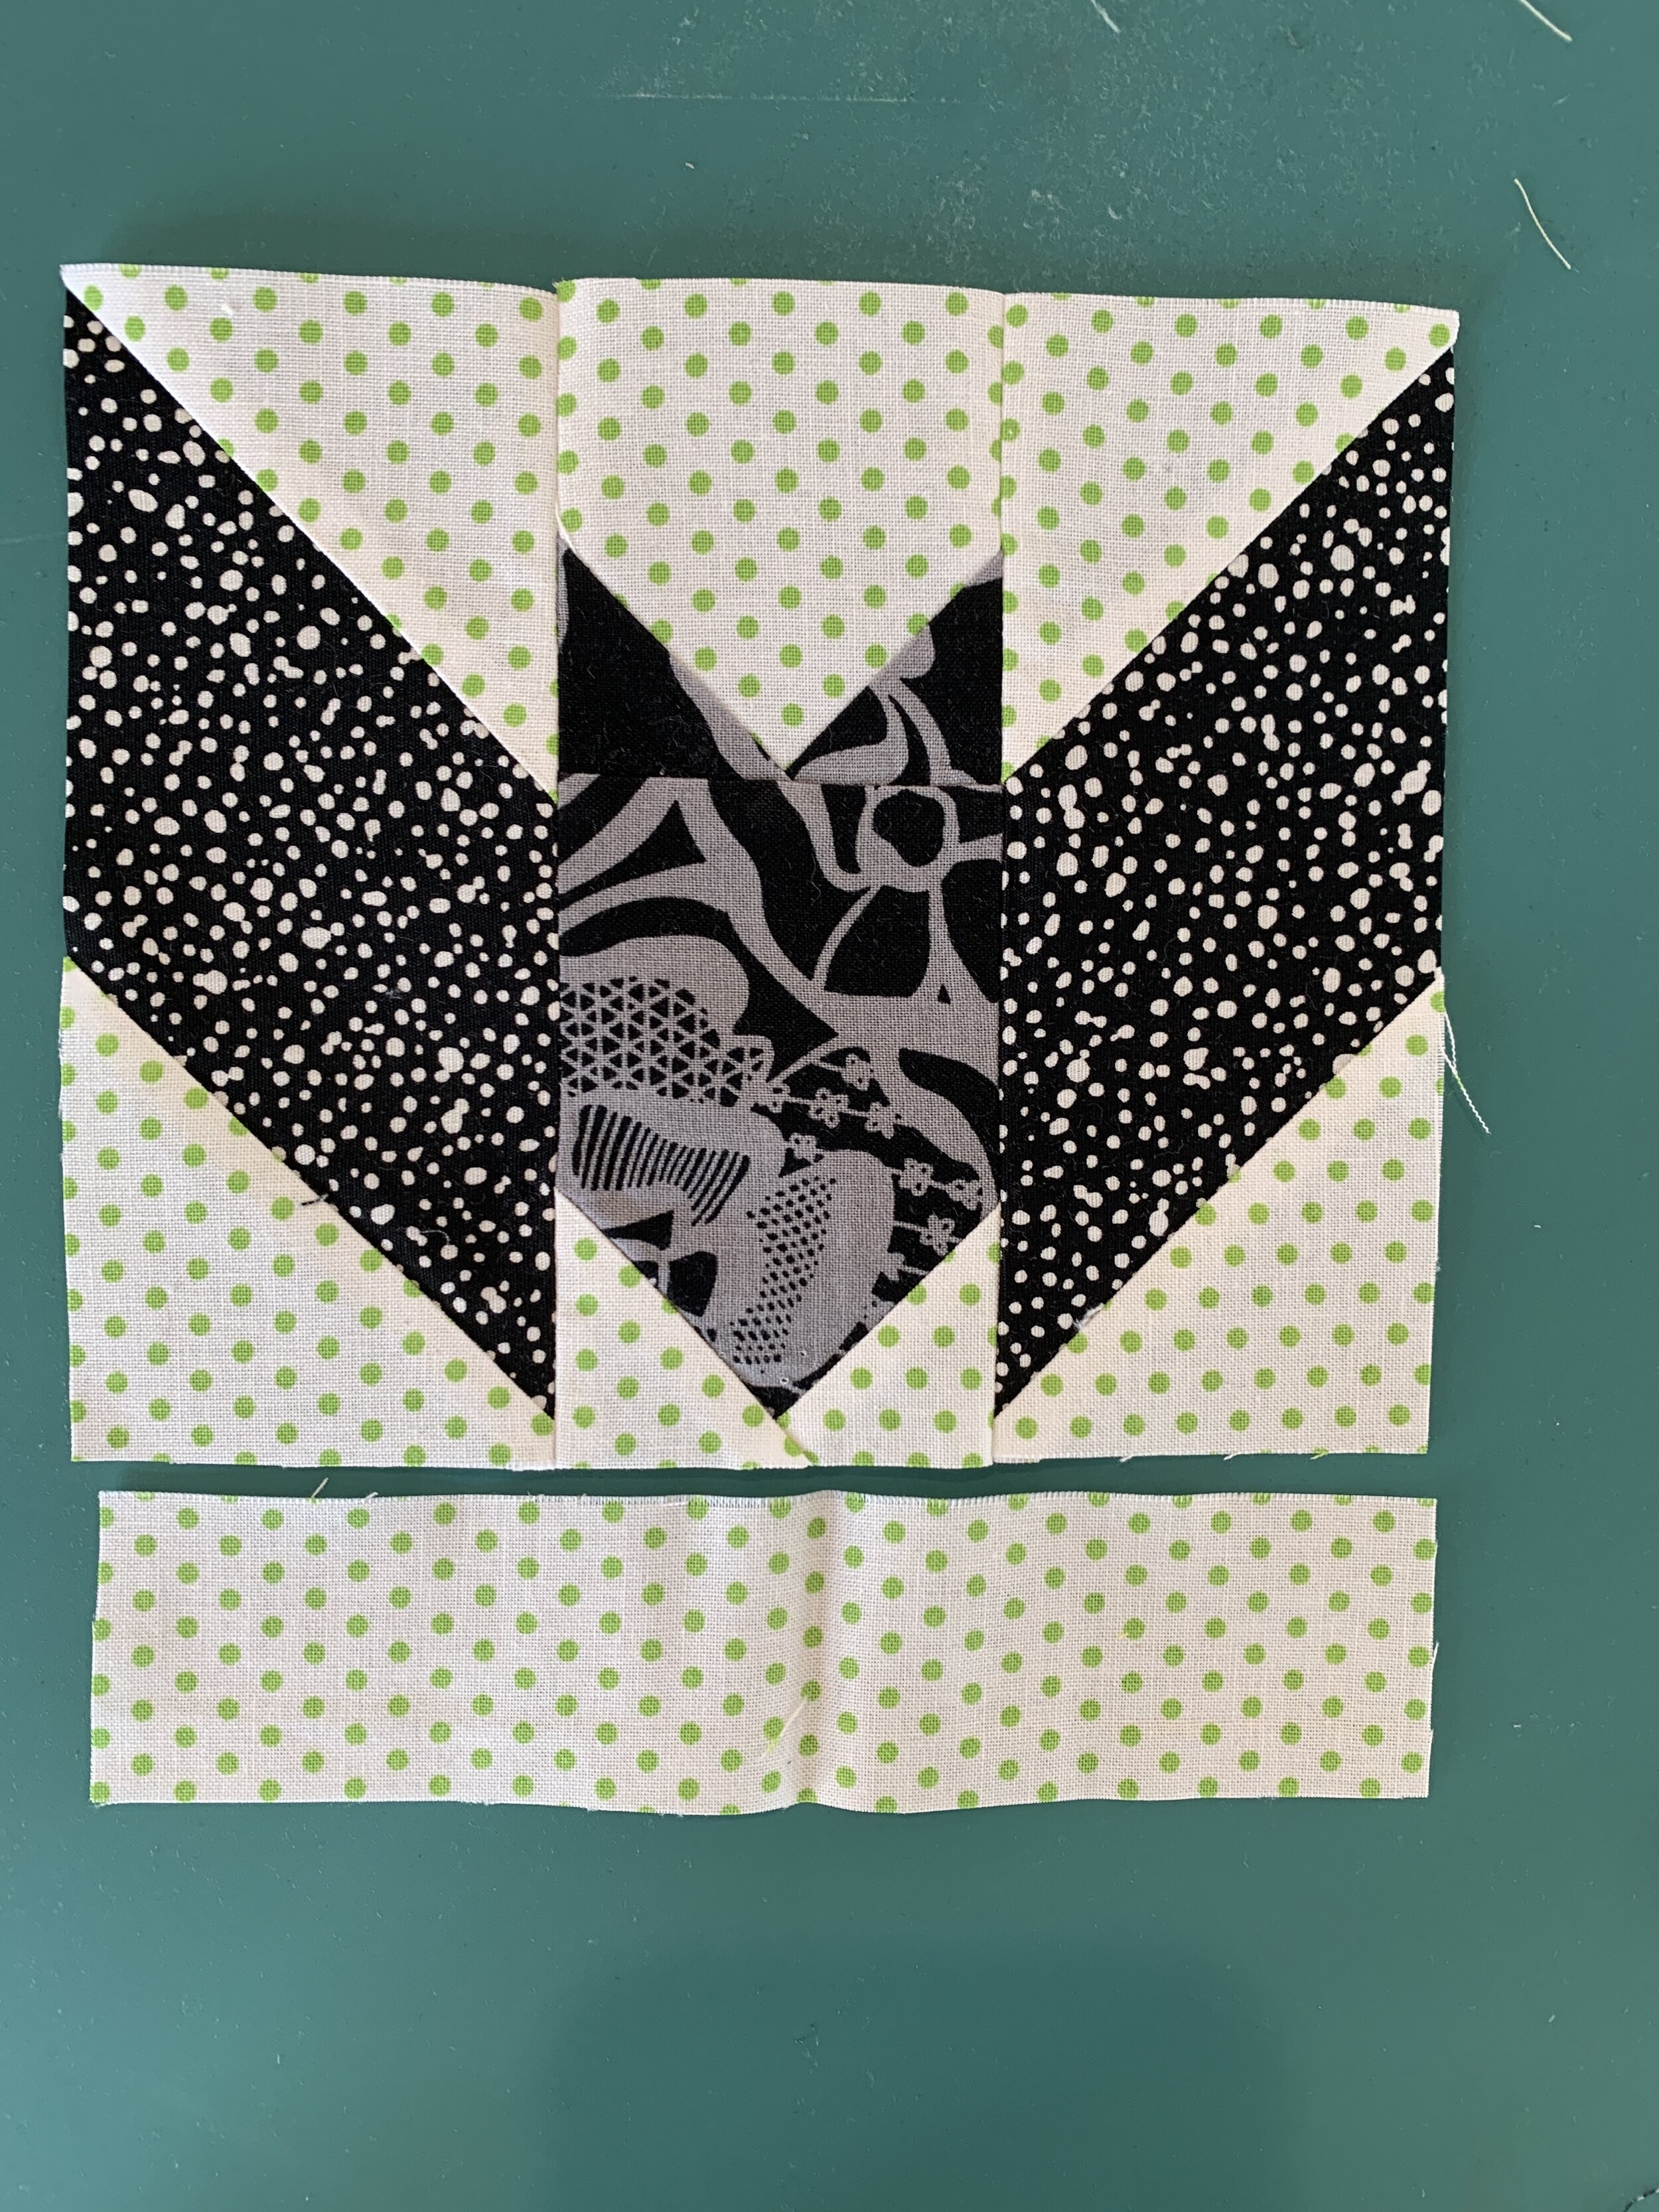
16) Arrange the two Bat Wings units on either side of the Bat Body unit. Note the orientation of the wings, both wings should be “down”.
a) Sew the Bat Wings on either side of the Bat Body.
b) Press seams open to reduce bulk.
c) Square to 6 ½”.


How to Make the Up-Winged Bat Block
Fabric needed for 1 block:
Background fabric:
5 – 2 ½” squares
1 – 1 ½” x 6 ½” rectangle
2 – 1 ½” squares
Bat Body Fabric:
1 – 2 ½”x 3 ½” rectangle
2- 1 ½” squares
Bat Wing Fabric:
2 – 2 ½” x 5 ½” rectangles
1) Let’s start by making the bat ears unit.
a. Select a 2 ½” square of the background fabric and 2 - 1 ½” squares of the Bat Body fabric.
b. Mark a diagonal line from corner to corner on both 1 ½” squares of bat body fabric.


2) Take one of the 1 ½” squares and place it on the bottom right corner of the 2 ½” square.
a. Pin in place.
b. Sew on the marked diagonal line.


3) Trim the bottom right corner by cutting ¼” away from the seam line. Press seam to bottom right corner.


4) Using the other 1 ½” marked bat body square, place the square on the bottom left corner of the unit.
a. Pin in place.
b. Sew on the marked diagonal line

5) Trim the bottom right corner by cutting ¼” away from the seam line. Press seam to bottom left corner. Square to 2 ½” x 2 ½”.


Bat Ears!
6) Now to make the Bat Body.
a. Select 2 – 1 ½” squares of the background fabric and the 2 ½ x 3 ½” rectangle of the bat body fabric.
b. Mark a diagonal line from corner to corner on both 1 ½” squares of background fabric.


7) Place a marked 1 ½” background square on the lower right corner of the 2 ½” x 3 ½” bat body rectangle.
a. Pin in place.
b. Then sew on the marked line.

8) Trim the bottom right corner by cutting ¼” away from the seam line. Press seam to bottom right corner.


9) Repeat this process for the bottom left corner. Square to 2 ½” x 3 ½”.


Bat Body!
10) Take the Bat Ears unit and the Bat Body unit.
a) Sew the Bat Ears units to the top of the Bat Body unit. Press seam to Bat Body.
b) Trim to 2 ½” x 5 ½”


11) Now to make the Bat Wings. For the first wing, select a 2 ½” x 5 ½” rectangle of the Bat Wing fabric and 2 – 2 ½” squares of the background fabric.
a) Mark a diagonal line from corner to corner on the back of both of the 2 ½” background squares.
b) Using the second picture as a guide to layout, place one background square on the top of the Bat Wing rectangle and the other background square on the bottom of the rectangle. Make sure the marked diagonal lines are going in the direction as shown in the picture.
c) Pin background squares in place.
d) Sew on the marked diagonal lines.


12) Trim the lower left corner AND then the top right corner by cutting ¼” away from the seam line. Press seam to background fabric. Trim to 2 ½” x 5 ½”.


13) Using the other 2 ½” x 5 ½” rectangle of the Bat Wing fabric and 2 – 2 ½” squares of the background fabric, repeat this process described in steps 11 and 12 to make the other Bat Wing. See the first picture below for orientation of marked diagonal lines on the background squares. Square to 2 ½” x 5 ½”.


14) Arrange the two Bat Wings units on either side of the Bat Body unit. Note the orientation of the wings, both wings should be “up”.
a) Sew the Bat Wings on either side of the Bat Body.
b) Press seams to the Bat Wing unit.
c) Square to 6 ½ x 5 ½”.

15) Last steps for this block.
a)Take the 1 ½” x 6 ½” background rectangle and sew to the bottom of the block.
b) Press seam to bottom rectangle.
c) Square to a 6 ½” square.

Another Spooktacular Bat Block!!
